Welcome

Welcome to my blog. I will attempt to make it much more than just a pitiful list of the relentlessly mundane minutiae of my daily existence but if you feel that I have failed try to imagine all the stuff that I haven't posted.

Friday 8 May 2015

Shrinking and vitrification

After the successful coprolite testing and firing I am now working on another research project. This time developing clay bodies and castable for kiln building for the Oxford Anagama Kiln Project . These are the second series of clay body tests, and what's interesting for me is how much can be learnt about a clay without recourse to expensive scientific approaches, such as chemical analysis and temperature expansion tests.
First up, shrinkage bars. These are made from around 100g of made up clays, rolled, flattened and marked accurately with a 10cm line. Dry shrinkage and fired shrinkage percentages can be measured. The bars also give other invaluable information such as colour (and likely iron content), warping, cracking and (as the far right bar on the lower line shows) bloating.

Straight from the stoneware firing in a gas kiln, the bars are weighed, then boiled in water and left for 24 hours. This is to allow water to enter any pores in the clay so that the clay can soak up as much as it can.
The bars are then wiped with a lightly damp sponge and weighed again.

Next is the vaguely Heath Robinson contraption shown here. The bars are suspended on a fishing line, from the scales, so that they are suspended in water. Their suspended weight is measured.
The porosity of the clay can be calculated using the following formula:
soaked weight - dry weight/soaked weight - immersed weight x 100
Simple!
Porcelain often has a very low porosity as it is fully vitrified, giving it translucency. However, over vitrification can be problematic for stoneware clays, and a porosity of between 2 and 4% is generally better.

I also need to get an idea of the expansion/contraction of the clay during firing, and thus the silica content of the clay. The higher the free silica content, the more the clay shrinks on cooling and therefore the less glazes might craze. Too much of this, especially in a long woodfiring, can lead to dunting and brittle pots. I make small tiles of the clays and put a standard clear, or in this case celadon, glaze on, so I can see the extent of crazing on them. Too much and I may need to add quartz to the mix, too little and less quartz or the introduction of a lower silica (higher crazing) clay.

Tuesday 21 April 2015

Shameless Plug

Back home after a very good Ceramic Art London show at the weekend. It's good to see such a broad variety of ceramics and international makers, and such high quality work. With this as a deadline, I produced a booklet containing
an essay describing my process and the inspirations for my work, illustrated with photographs of recent work alongside some of the places that I go to to collect materials.
The price is £10, including P+P to the UK mainland. To buy a copy, or enquire about overseas postage, please follow the email link on my website homepage.


Now home, with stand flatpacked and put away, it's time to continue with my research into homemade refractory castable mixes and clay bodies suitable for longer midrange woodfirings. It is much harder to find any variety of fireclays in the UK than it was a few years ago - I suppose as coal mining has almost finished and stockpiles of fireclay are dwindling. If anyone reading this has any information about UK fireclays please contact me!

Tuesday 31 March 2015

Galerie de L'Ancienne Poste

As the wind howls fiercely across the country I feel lucky to have chosen to drive to France and back using the Tunnel rather than ferry.
Last week I packed up the car with work from the last two firings and drove down to Toucy, south of Paris, to deliver work to the Galerie de L'Ancienne Poste for my solo exhibition there. The work was set up for the opening on Saturday giving me time to explore the beautiful town.
We were staying in a gite overlooking the south of the town and the impressive church at its centre, amid narrow cobbled streets and some beautiful old buildings. The local patisseries and cafes gave me far too much opportunity to realise how much French I have forgotten through years of lack of use. I spent much time scrabbling through a ridiculously small English/French phrasebook trying to decipher menus and simple conversation, resolving to re-learn the language.
Our hosts, Isabelle and Christophe, were extremely hospitable and it was a real pleasure having time to dine and talk with them - luckily (and embarrassingly) their English was far better than my French!
The opening was on Saturday evening, which went very well. It was good to meet some of the new owners of my work and see their reaction to the exhibition.
I took these photos on the Sunday morning at 10am just before the long trip home.
If you live near to Toucy or are visiting France, please go along to the gallery. It shows great examples of my work and it's so much better to see it in the flesh than in photos.

Tuesday 10 March 2015

Who would have thought.......

....that dinosaur dung could look so good?
The testing stage that I've been carrying out on this unusual material is over and I have a range of glazes for different parts of the wood kiln.
This test tile shows a series of lineblends fired in my gas kiln to cone 10, where I managed to get the refractory coprolite to melt into a glaze. It's coloured the glaze green due to its iron content, but seems to have added little to the character of the glazes in these tests. I was happy with these tests as I finally managed to get the coprolite to melt, rather than just sit suspended in the glaze.
Last week I fired my wood kiln and dotted test pots around the kiln with four test glazes selected from this tile.
I'll upload a few images of these little pots, which gave quite varied but rather beautiful results. There were good ash deposits throughout the kiln, but there are also quite distinct areas within the pack - each with its own characteristics. All of the glazes selected gave good results in at least one of these areas, but not all.
This is how I usually test my glazes, so that I can plan the pack carefully and use specific glazes for particular places within the kiln.
Now I'm ready to glaze the final pieces and fire them in the smaller wood kiln.

Saturday 7 March 2015

Schrodinger's cat

All possibilities are present within an unopened kiln: every success, disaster, mistake, fault or beauty: a superposition of states. At last, once well cool, the kiln door was unbricked, the wave functions collapse and I can see what reality has decided. Is the cat alive or dead?
Now, a day later, when most crazing and possible dunting has occurred, I can see that the cat is alive. Not merely alive - it's running round the workshop doing tricks! Impending disaster precluded, it looks as if it was one of my very best firings.
this view is through the stoke hole into the first stack. As you can see cone 12 as well as safety 15 is still standing, indicating a cooler front than usual.
There is some heavy crystallisation on the surfaces here, which is mostly welcome.
The sidestoke area was, as usual, the hottest, and I got some really stunning pieces from the parts of the stack facing this area. In gas kiln tests the glazes that I have developed are often rather stiff, fat and uninteresting. I'm hoping that the ash and volatiles from the firing are really going to effect them, creating variation in colour and texture, and really pull some beauty out of them. This piece has a white silica rich glaze from Edinburgh rocks. I love it when it breaks to watery electric blues like this.
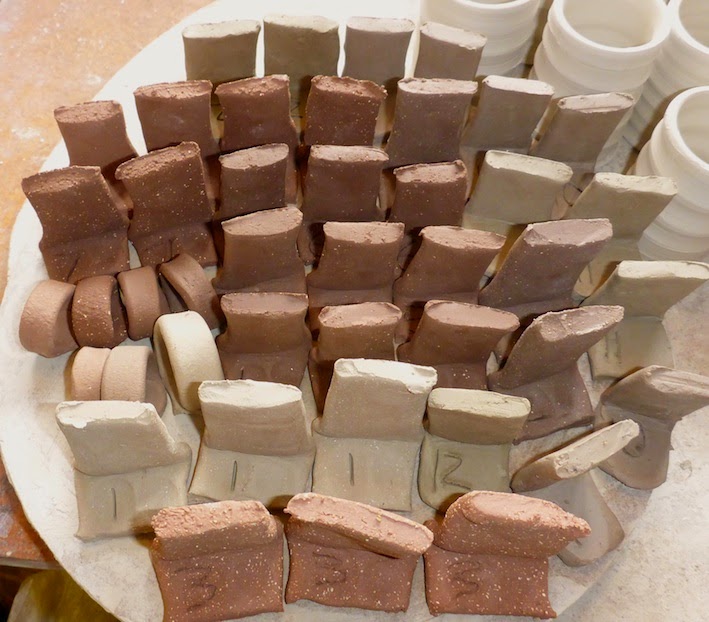
Many of the pieces I made for this firing were carved, exposing the structure of the clays I am using. This bowl shows the variation of colour I managed to get throughout the kiln, and the quality of the coarse clay.
The photos are just quick snaps outside the workshop as I begin the grinding process. I will post properly done ones soon.
As usual, there were some disappointing results, especially so with pieces that took hours and hours to make, but there is a broad range of spectacular colour and textures. I seem to have managed to reduce the tendency of glazes to peel off pots during the early stages of the firing, but other faults are rearing their ugly heads. It is particularly hard woodfiring heavily glazed pots in an ash rich firing, on found clays  (it's stressful on both the potter and the pots), but the occassional flashes of brilliance make it impossible to give up. The new fault is in small areas on pots, where ash runs form sugary matt surfaces on cooling, but appaer to contract slightly less than the glaze layer/clay below them, and start to look a little like crazy paving, with rough edges. It often seems to happen on the vesry best pieces so is a serious problem. Any advice welcomed!

Monday 2 March 2015

The long slow cool

After a day of torrential rain and the gales blowing today there was a (fortuitous rather than anticipated) window of rather gentle dry and often sunny weather, where the beginnings of Spring can be felt pushing through the hard shell of winter. What a great time to fire the kiln!
Andy came over to help (taking holiday from his full time job - thanks Andy) and on the first day Brigitte (who helps Svend Bayer fire his kilns) came up to the edge of the Fens as well.
On the whole it was a pretty cruisy first day - lit at 7am, red heat starting at the front at noon and kicking into reduction at 3pm. Once reduction is settled I aim for a good steady rise in temperature till cone 8's start going down throughout the kiln.
It is soaked overnight at this temperature, and typically cone 9's and cone 10's slowly tip during these shifts. The firebox area is not that big and, when the fire and embers are up close to the stack, the front tends to be a little cooler than the rear chamber. That was certainly the case this time, with cone 8 still not quite over at the front by 8am. Sidestoking is only to build up an ember bed mid-kiln and care must be taken not to heat up the back chamber too much.
Nudging the kiln back into a gentle temperature rise involves coaxing a heat build up in the front firebox until the wood starts crackling and the whole kiln seems to liven up. Six hours later and the temperature has risen by about 50 - 60C and cones 12 are down at the top and bottom of the back chamber. Despite my nerves cone 11 is well over at the front and cone 12 has started tipping. This seems quite acceptable. I quite like the very front being a little cooler than the rest as I often get some beautiful crystallisation and satin surfaces here. Back on to gentle stoking with small wood, right up the front of the kiln to keep the embers away from the stack, a one hours soak and it's a progressive clamming up, aiming to keep smoking to a minimum.
I love that time just after a firing, when it seems to have gone well and all the correct cones are down. It seems wrong to leave the kiln alone, so time for a few celebratory beers to toast the firing and to talk about the firing and pots in general.
The next morning it's still red hot inside the kiln + with aching muscles I braced the rising wind to walk the local fens. The long wait has started.

Tuesday 17 February 2015

Who says men can't multitask?

After the incessant rain of yesterday it was a pleasure to continue packing the kiln in clear skied sunshine. Chilly, yes, but no time to worry about fridge cold wadding on my fingers.
I'm taking my time to pack the kiln - many pots are glazed but I'm continuing to glaze as I got - getting the best pack I can with the most appropriate clays, slips and glazes for each part of the packing space. Feeling unseasonally full of energy I decided to do a glaze firing in the gas kiln as well today. Pretty simple really to balance the two - until reduction time when the kiln suddenly became atypically unresponsive. One of the flame failure devices had given up
resulting in frantic repair work to get the burner back on. Finally I was back on track with a slow temperature rise in gentle reduction. Kiln packing continued along with a delivery that needed unpacking and hauling up to my workshop, gas delivery and the last of the rocks dry milling and needing seiving.
I'm typing one handed, holding a glass of excellent Rioja, as I write this. Aching slightly, but feeling nicely chilled and chuffed as I mull over all the things I did today. The firing finished smoothly, with an oxidised soak - cone 10 half down. The front chamber of the kiln is packed, and I'm halfway up the left hand stack in the back chamber. 2 days down, maybe only 1 to go.

Sunday 8 February 2015

True Grit

Glazing is well underway and I'm preparing the last of the rocks needed for my rock glazes - a coarse pink granite  and a darker microgranite from Cumbria. I've crushed and milled the hardest/most difficult rocks - notably a Cumbrian rhyolite and some of the limestones I have - and these last are pretty easy.
First up I calcine them in my small test kiln - just up to a good red heat - maybe around 800C. It doesn't matter exactly how hot as long as the rocks are red hot right through. Sometimes I have to use a steel mallet to get them into manageable size and they are truly hard! These have been calcined + all the moss/lichen burnt off.

During this process the crystals in the rock expand and contract at different rates making them beautifully crumbly. Next it's the turn of my trusty mortar and pestle, and a good stretch of time.
Repeated crushing and seiving
to get the rocks down to this size grit. They are then dry ball milled for 3 hours or so to get the particles down to dust size, which is probably around 100 - 120 mesh.
Then, blending with other rocks and clays to get my glazes. I'm aiming to finish glazing this coming week, finish splitting wood and still have to grind glazes off the floor of the kiln.

Wednesday 28 January 2015

New year. New start.

Despite my best intentions the frequency of my posts over the last 6 months has been rather low - not due to any lack of frantic activity at the workshop, but possibly because of my reluctance to take my expensive camera there to record my days amid the dust, damp and disarray. So, I now have a waterproof, shock proof (workshop proof) camera to record my process much better.

Most of my making is now over - managed this year without anything freezing and getting ripped apart by ice - and the next stages are well underway. My shoulder muscles are complaining as I type this, as I'm busy crushing rocks in my steel mortar and pestle down to 3mm grit ready for ball milling. This is a carbon rich limestone - one of the few rocks that I wet mill - drying out on plaster.

The second to last biscuit firing is packed and has spent the day on a very low burner drying out. There are some high carbon bodies inside, my milled sort-of-porcelain, and that difficult secondary kaolin body that needs it taken nice and even and slow to prevent firecracking.


The odd little red/brown shapes are setters to put the side fired pots on in the wood kiln.

And finally, for this post, a selection of clay body tests for the next wood firing. I always put a variety of tests in a firing - new clays and glazes - and this time I have additional tests from 2 research commissions I am undertaking. one of these is the coprolite project, and the other developing darker clay bodies using local British clays.